I still haven't made one for a baby girl yet -_-
But here is a 1:12 scale baby boy cake! Welcome in the newest baby doll. I just love making all the small details on cakes! Recently I switched from using a needle tool to using an actual needle! It just have a finer tip, and I feel like I have better control with it. I don't know why, but the clay didn't bake all the way! So its super fragile right now.
Hello! My name is Ashley. This is a blog for my polymer clay creations! I'm a homeschooled teenager, and I picked up this hobby about 2 years ago. I hope you enjoy!
Wednesday, February 12, 2014
Mr.Fredricksen from UP
This year I want to (as I mentioned before) explore other types of arts. And so I'm exploring charm making! Yes, chibis, kawaii charms, all of it! And this is one that I've been wanting to make, but I put it off because I convinced myself that it was too hard, and that I couldn't do it! But I decided to give it a try, and it turned out very well! I constantly referred back to a picture of Carl Fredrickson. I wanted to sculpt as many details into him as a could. As you can probably tell, it took a looong time! He is purely polymer clay! (Except his painted eyes) So challenge yourself! Try something new :)
Tuesday, January 7, 2014
It's a New Year!
Well, last year I kind of put jewerly making to the side, so that I could focus on sculpting realistic miniatures. It has definitley worked out, and I've progressed a lot this year. I hope all of you had a good 2013 as well!
This year, I'm working on engaging in a variety of arts! I want to get better at sketching, and painting, and next year I want to be ready to build a dollhouse!
This picture of a miniature polymer clay leg of lamb is just (to me) exactly what I wanted to accomplish last year. Thanks to all who view this blog :)
Saturday, December 21, 2013
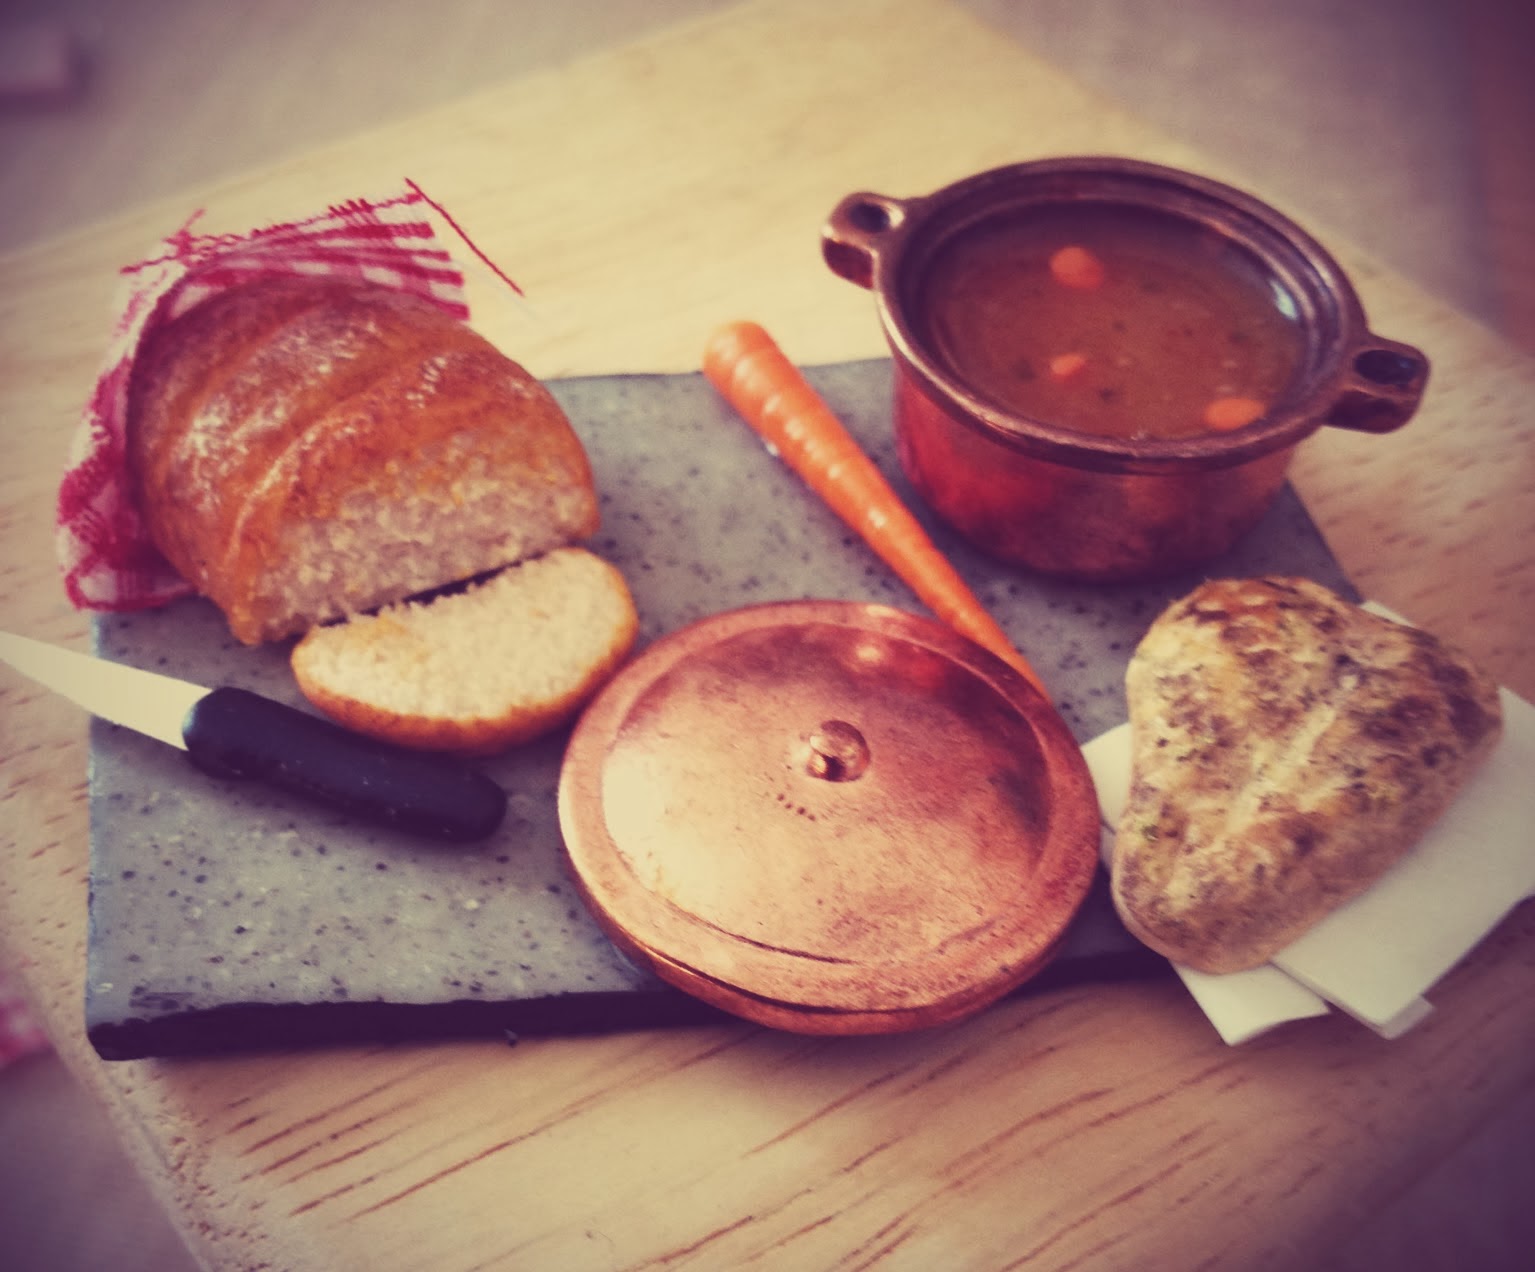
Dollhouse old fashioned dinner preperation table.
This is a project that I've been wanting to do for a very long time! I made a simple broth with TLS, chalk pastels, and a tiny bit of brown acrylic paint. I made a basic carrot cane, and added some slices. I added landscape project grass for herbs. And to make it look more realistic I put a thick layer of glaze after baking. The chicken breast is one that I made a while ago...(I sculpted it after the real thing). The table counter was just made with sculpey granite clay. (And after I painted the bottom and sides with black acrylic paint). Everything else can be seen on SugarCharmShop's miniseries #1 videos. Please go watch them!! :)
Thursday, December 12, 2013
Chocolate&Cherries bakery- Complete collection
I LOVE the cherries I sculpted after watching a tutorial on it (Sugarcharmshop), and I made so many that I decided to make a bakery set! The theme is chocolate&cherry! My absolute favorite is the swiss cake roll. It was really fun to make, but I had to look up ideas on Pinterest. Have a nice winter! :)
Thursday, December 5, 2013
Cherry Cupcakes!
I made a couple cherries, after watching SugarCharmShop's video. Then, I decided I didn't want them to just be loose peices, so I made cupcakes!^^ Something sweet, and good to eat!
Wednesday, December 4, 2013
Miniature Polymer Clay Gingerbread House
I wasn't feeling well, so oddly enough I felt like sculpting this tiny gingerbread house. I made and baked the house first, then decorated it. I would try to describe it all in detail, but I don't remember all the steps. Have a nice winter! :)
Tuesday, October 29, 2013
The Sweet Shop Collection.
I love making miniature ice cream! Sculpting the texture though, can be very difficult. Here's a tip! All you'll need is a needle-tool, and a toothbrush! 1st-Take the needle-tool and makes lines all around the ice cream with the dull side (so don't use the tip), 2nd the point and make lines and texture the edges. 3rd, take a toothbrush and texture the top. For the soft serve I used silicone and the smallest cake tip I could find. I got the printable candy templates off of toniellison.blogspot.com.
Friday, September 13, 2013
Miniature chicken roast
Making the right texture in meat is extremely difficult when using polymer clay. The wrong color, shading, or shape can easily turn into a "what in the world is that?!" kind of project! So here are some tips to help make your savory minis' look their best! 1. For chicken it is best to start with a tan/ translucent mix (about 3 parts tan to 1 part translucent). This way, you can shade the meat to what degree of roasting you want. 2. Start with light shades and use darker tones towards the top where it would most likely "burn" or "roast" a little longer. 3. Use aluminum foil to create the texture, but not too rough or lumpy. 4. With meat it's best to look at a picture, or better yet the real thing before starting. 5. Seasonings! This can be created using the real things! Maybe a little paprika here, or dried herbs. (I used fake seasonings such as shaved black pastels for pepper and landscape grass for projects for the herbs). In all, trial and error is the best way to learn new techniques!
Thursday, September 12, 2013
Poptarts (realistic version)
The poptarts I previously posted look nothing like actual poptarts, so I wanted to pose these new ones that I made after watching SugarCharmShop's YouTube video on how to make them. I really loved the results.
Pizza! (New Technique)
Cotton Candy! (+tutorial)
Cotton candy has always seemed impossible to make! It's actually one of the easiest miniatures I've ever made! Choose your desired colors of felt (preferably light colors) and start pulling the felt at the tip or corner. once you have a nice little amount, roll it into a small ball. After that, keep fulling and wrapping around that ball to get the shape/size you want! To make the cones get a white piece of paper and use a circular object and trace it. Then, cut it out and make a slit in the middle and wrap it around. Then glue it and glue the cotton candy onto it. Use clear plastic or cellophane to make the bag! Use a needle tool to make a hole at the top, and glue in an eyepin if wanted. It's a fun project! :D
Handmade Polymer Clay Lobster!
I made 2 of these, after I decided that my previous lobster looked nothing like a lobster... So I looked up a picture of a real lobster, and took it piece by piece.*TIP* If you are sculpting something for the first time, study a picture!
Barbecue Miniature Collection!
First of all, I apologize for not posting anything for a... while. But this is just a collection I've been working on for summer! Hope you enjoy. (More tutorials and pics on the way).
Sunday, July 21, 2013
Tacos!!! Who doesn't like them?
I personally love a good taco salad! I pre-baked the shells, so as not to mess them up. I mixed the clay with sand to create a nice grainy taco look (for more info. on how I did that, look back to my nacho tutorial).
Dollhouse Banana Nut Muffins
I have always LOVED banana nut muffins among all foods, I've long wanted to sculpt some out of polymer clay, but I've never before been able to get the right texture of muffins. It's sounds down right silly now, but it's challenging! I placed some pecans and a banana peel for decoration. To make the muffins, and the banana slices, I used SugarCharmShop's brownie technique, except in muffin form (if that makes any sense to you guys). Leave a comment if you have a question! :D By the by, sorry about the blog format, I'm having trouble adjusting theme and color..
Brownies!+TUTORIAL
Dollhouse sprinkles cake
I sculpted this adorable mini after I watched Toniellison's birthday cake tutorial on YouTube! I switched it up a bit.....but there's ice cream! I used deco sauce instead of TLS to make the chocolate.
Monday, July 15, 2013
Pizza- From old to New
Pizza has been one of the hardest miniatures for me to make. Getting the right texture, color of cheese, pepperoni. These pizzas have been made from 2 years ago until now. Even though pizzas are so hard to make, I always think they are the most fun project! :)
Wednesday, July 10, 2013
Breakfast Collection! + eggs,bacon, and pancakes TUTORIAL
I absolutely LOVE breakfast food! I found new techniques for making eggs, and pancakes! I know that eggs are extremely hard to make, mostly because of the texture. Okay let's get to it!
Eggs- SUPPLIES
1. Racoon Honey white whipped cream clay (sold on Etsy.com)
2. Yellow clay
TUTORIAL
First, squeeze out some of the whipped cream clay, and then add a small amount of yellow clay. Mix it in, but not thoroughly, so that their are still some yellow, and white clumps. Then, arrange it (but don't try to smooth out the texture) on a plate, or whatever you choose.Bake it, then you're done! It's so easy, that it's annoying to think that I didn't figure this out sooner!
Bacon- SUPPLIES
1. blush pink clay, and translucent
2. dark brown chalk pastels, a blade, and a brush
TUTORIAL
First, take pink and mix it with translucent. Now, roll it through a pasta machine, or just use a roller. Roll out a layer of translucent at the same setting. Then, stack them, and slice half and stack that. Now, press it down into the size you want. Now, take the pastels and color the bacon, to make it look browner and cooked. Arrange how you want, then bake!
pancakes- YouTube tutorial on heart pancakes! The technique is great! Just look up polymer clay heart pancakes.
I hope this helped!
Subscribe to:
Posts (Atom)


.jpg)